

Item description
| Highlight |
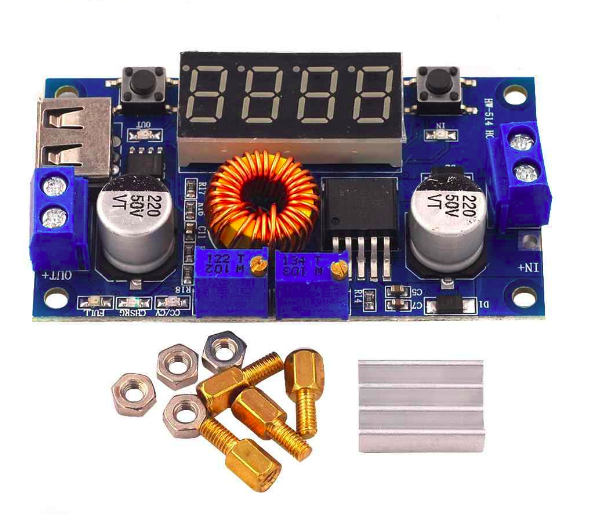
5AConstant voltage constant current buck power moduleRechargeable lithium battery with display LED driver
With voltage, current and power display, it can be easily used without a multimeter, powerful!
With USB interface, it has 3 major functions to satisfy most of your occasions!
Module highlights
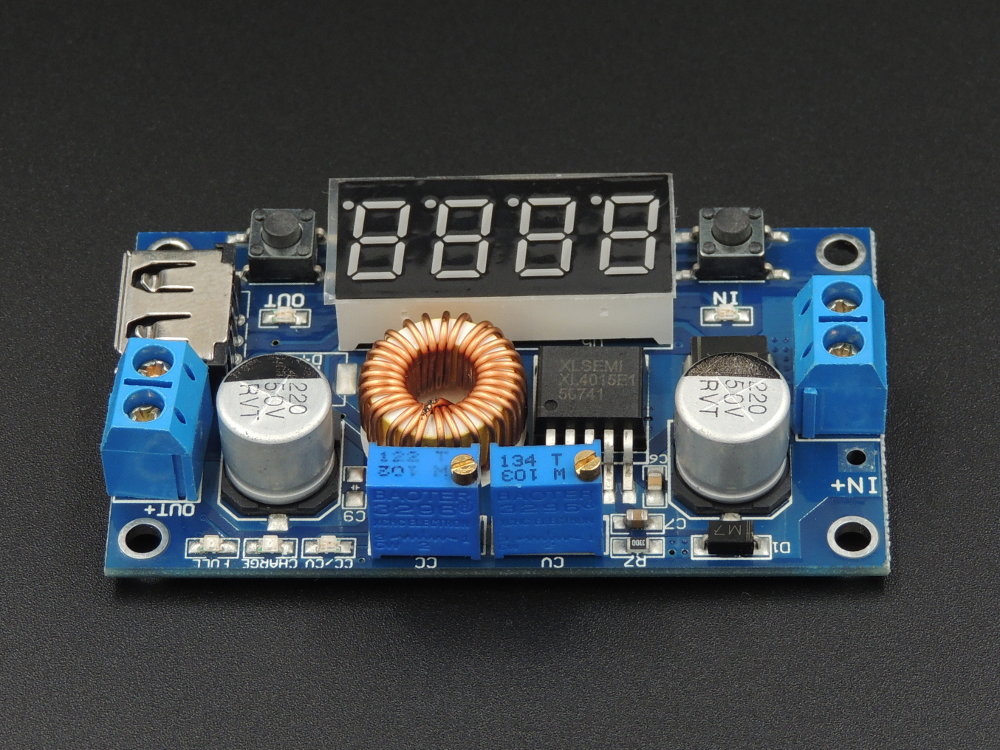
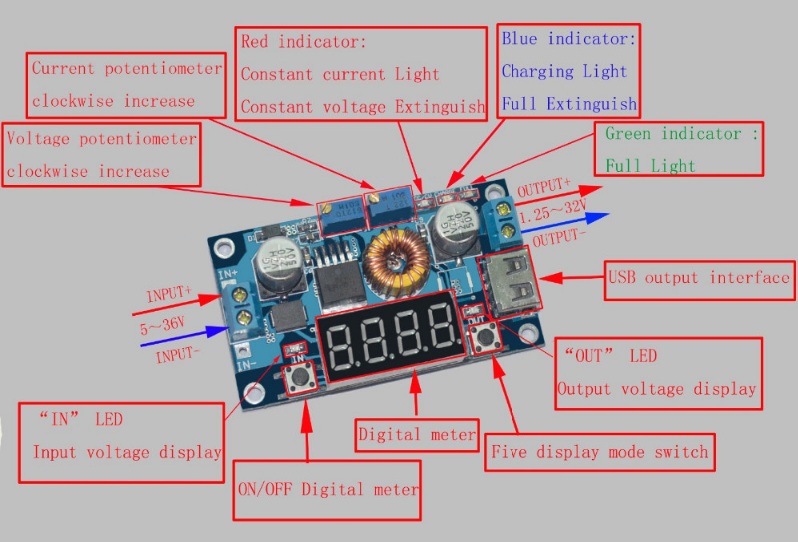
1. Onboard voltage, current, power meter, you can easily use this module without a multimeter, more convenient and more intuitive.
2. Onboard USB interface, can easily charge your digital products. (Note: The output voltage of the USB is the same as the output voltage of the module. It is not a fixed 5V output. Please confirm before charging the USB device)
3. High power, high efficiency, 5A , low ripple ;
4. Three major functions:
( 1 ) Used as a common step-down module with overcurrent protection capability ;
( 2 ) It is used as a charger for lithium batteries, batteries, nickel-cadmium nickel-metal hydride batteries (battery packs) of various voltage values, and is used in solar panels, wind power generators, etc .;
( 3 ) Used as a high-power LED constant current drive module ;
5. There are two modes of constant voltage and constant current, and there are indicator lights to indicate which mode the module is currently in ;
6. When used as a lithium battery charger, you can set the float charge voltage and charge current size, there is an indicator light
Indicate whether it is charging or already full ;
7. With current limit protection function, even if the output is short circuit, it will not burn the module.
|
| Information |
Item weight
Barcode
Created time
Last updated on
|
| Item description |
Module parameters
Input voltage : 5-36V
Output voltage: 1.25-32V continuously adjustable
Output current: adjustable, maximum 5A ( recommended to be used within 4.5A )
Output power: maximum 75W (recommended to use within 50W , please reduce the power when using large pressure difference)
Working temperature: -40~+85 degrees
Working frequency: 180KHz
Conversion efficiency: up to 96%
Short circuit protection: yes
Over-temperature protection: Yes (output is automatically turned off after over-temperature)
Input reverse connection protection: none, (if necessary, please connect a high current diode to the input)
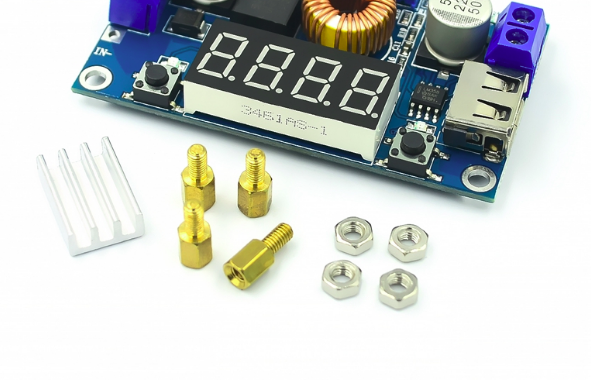
Installation method: 4 pieces of 3mm screw
Wiring method: terminal or welding terminal, V-IN is input, V-OUT is output
Module dimensions: length 68.2mm width 38.8mm high 15mm
Weight: 35g
Instructions:
( 1 ) Determine the float charge voltage and charge current of the battery ; (If the lithium battery parameter is 3.7V/2200mAh, then the float charge voltage is 4.2V , the maximum charge current is 1C , which is 2200mA )
( 2 ) Under no-load conditions, adjust the digital meter of the module to the [Display Output Voltage] interface, and adjust the "constant voltage potentiometer" to make the output voltage reach the float charge voltage ;
( 3 ) Adjust the digital meter to the [display output current] interface, directly short the output end of the module (just find a thick wire to short the output end) , then adjust the "constant current potentiometer" to make the digital meter on the The current value reaches the preset charging current value ;
( 4 ) The charging lamp current defaults to 0.1 times the charging current in the factory ; (The current of the battery gradually decreases during the charging process, and gradually changes from constant current charging to constant voltage charging. If the charging current is set to 1A , when the charging current is less than 0.1A , the blue light is off and the green light is on, and the battery is fully charged at this time )
( 5 ) Connect the battery and charge it.
(Steps 1 , 2 , 3 , and 4 are: the input terminal is connected to the power supply, and the output terminal is no-load without connecting the battery)
3. Used as LED constant current drive module
( 1 ) Determine the working current and maximum working voltage of the LED you need to drive ;
( 2 ) Under no-load conditions, adjust the digital meter to the [display output voltage] interface, adjust the "constant voltage potentiometer" to make the output voltage reach the LED working voltage ;
( 3 ) adjust the digital meter to the [display output current] interface, Directly short- circuit the output end of the module (just find a thick wire to short- circuit the output end), then adjust the "constant current potentiometer" so that the current value on the digital meter reaches the preset LED working current ;
( 4 ) Connect the LED and test the machine.
(Steps 1 , 2 , and 3 are: input connected to power supply, output no-load and not connected to LED lamp)
    |
| Conditions |
Precautions The input ground and output ground of the module should not be together, which will cause the bypass of the current sampling resistor of the module, so that the module cannot adjust the output current, and it is easy to burn the module when connected to the load.
There is a current sampling resistor in the output end of the module. After connecting the load, there will be a voltage drop of 0~0.2V , which is normal.
Some customers report that the output voltage of the module cannot be adjusted. When you encounter this problem, please turn the potentiometer counterclockwise more than 10 turns before using the module to adjust the voltage normally. Because the module is shipped from the factory, the default output voltage is 17V .
When the output exceeds 3A and 35W , please strengthen the heat dissipation!
Onboard voltage, ammeter self-calibration method:
1. When the onboard digital meter displays the output voltage, press and hold the right button for 2 seconds and then release, the voltmeter and the output voltage indicator " OUT " flash simultaneously, and then enter the output voltage calibration mode; similarly, display in the voltmeter When the voltage is input, press and hold the right button for 2 seconds and then release it. The voltmeter and the input voltage indicator " IN " flash simultaneously, and then enter the input voltage calibration mode; when the voltmeter displays the output current, press and hold the right button 2 Release after 2 seconds, the ammeter flashes, then enter the output current calibration mode;
2. Touch the right button, the voltage (current) increases by one unit, touch the left button, the voltage (current) decreases by one unit; because the voltage value of a unit is less than 0.1V , you need to continuously press 1-5 Only then can you see that the voltmeter has changed by 0.1V . The specific number of consecutive key presses depends on the currently displayed voltage value. The higher the current displayed voltage, the fewer the number of presses;
3. After the voltage (current) adjustment is completed, press and hold the right button for 2 seconds and then release. At this time, you can exit the calibration mode, and all parameter settings are automatically saved after power-off.
Note: This function is used to calibrate the display accuracy of voltage and current, not to adjust the output voltage and current value. This function is designed to meet your higher accuracy requirements. You only need to calibrate once to get accurate values over the entire range. Please rest assured to use. |
| Tags |
Exchange or return policy
Every item comes with a 30-day warranty. However, there are certain conditions that apply:
-
The customer should not be responsible for any self-inflicted damage, such as incorrect power connections (for example, supplying 5V instead of the required 3.3V for a sensor).
-
The product must be in perfect condition, without any breakage or damage caused by electricity (e.g., short circuits leading to electrical fires).
-
The store does not accept product exchanges due to customer misunderstandings, such as purchasing the wrong size for their project or buying something without eventually using it. Customers can inquire about the product details and ensure compatibility before making a purchase by contacting us through our Line account @modulemore during business hours. Please note that there may be delays in response between 12:00 PM and 2:00 PM.
Return Policy: To initiate a product return, customers must provide the original receipt or a copy for quick verification. Returns can be sent to our store address by following these guidelines:
- Provide a detailed description of the damaged item(s).
- Mention any tests or experiments conducted by the customer.
Please note that the store reserves the right to make the final decision regarding product replacement or refund.
English▾


MEMBER ZONE

JOIN US
ร้านModuleMore
/www.modulemore.com/en
Become a member of this store to receive special offers and promotions
 ModuleMore
Become a member of this store to receive special offers and promotions


Special thanks very good images from Freepik
English▾
Choose your language
Language
Currency
Change
Modify language
▲
▼
My orders
My orders
This seller's information

ModuleMore
Arduino compatible board, Iot, ESP32, ESP8266, Nodemcu, Raspberry pi, micro:bit and etc.
Mobile number : 0831710868
E-mail : paheyisoicus@gmail.com
E-mail : paheyisoicus@gmail.com
Send message to seller
About this seller
Search items from this seller
Search for items
Recently viewed items
Favourite this seller
Join as a Member
Share this page
Share this page
↑
TOP Back to top
TOP Back to top
Items in cart ({{total_num}} type)

We apologise, your cart currently is empty
Total
฿ {{price_format(total_price)}}
- ฿ {{price_format(discount.price)}}
Total
{{total_quantity}} Unit(s)
฿ {{price_format(after_product_price)}}
excluding shipping fee
VAT Included.
➜ Continue shopping